Friday, March 4, 2011

Chai & Soy Milk Soap Recipe

1lb grated basic soap (see yesterday)
8oz soy milk
2oz soap nut concentrate  (in lieu of this just add more soy milk)
2 bags chai tea

-Break open tea bags and steep in warm soymilk & soapnut mix. Pour into grated basic soap and melt over low heat. Mold and allow to set overnight. You can then cut bars and allow to cure, about 10 days for this recipe.

If you probably won't make this soap but want some anyway send me a message at brandi_kaleka@hotmail.com. All it'll cost you is your immortal soul....fair...

Superfatted Soap Recipe


Superfatted Soap Recipe (taken from The Complete Soapmaker, p. 73)
1lb grated basic soap (see yesterday for making basic soap)
8oz water (I used the soap nut concentrate, again see yesterday)
1oz each cocoa butter, sweet almond oil, lanolin and glycerine
10 drops essential oil

- Melt the soap with the water on really low heat (2 or 3). Stirring too rigorously can cause bubbles so take it easy. In a pan heat the cocoa butter until melted, then add the oils, lanolin & glycerine and melt. When soap and water have completely melted down add the warm oil and stir completely. Pour into a mold and let it dry overnight. You can now cut it into bars. Bars will be soft and depending on the recipe, they can take up to a month to cure; this recipe takes about a week.

If this makes your mouth water but you think that actually making them may end up on a pile of good intentioned  "to do's", perhaps I could send you some. brandi_kaleka@hotmail.com

Thursday, March 3, 2011

Soap Nuts - the everything cleaner

laundry soap, surface cleaner, toilets, soap scum, floors, pets, jewelery, seriously everything...

The first I ever heard of Sop Nuts was in 2009 at a small business expo. They weren't in their raw form but there were two companies using them as the active surfactant in their products. What is this Soap Nut? Turns out that yeah, it's a nut, actually a nutshell, Sapindus Mukorossi. The shell has a thick coating on the inside. When you boil them in water they create a natural surfactant. (surface-active agent: a substance, such as a detergent, that can reduce the surface tension of a liquid and thus allow it to foam and penetrate solids; a wetting agent). Hence the secret ingredient in a certain company's top secret ingestable ingredient which 'Makes Water Wetter'. There it is, mystery revealed, just buy the nuts. This 1kg bag could do 500 loads of laundry or clean enough countertops to wrap around earth, maybe even twice. The point is it'll last a long, long time. Even better, you won't have to use chemical detergents and cleaners. You don't even have to sacrifice efficacy. I've been trying them for almost a year (same bag) on all kinds of cleaning and the only thing I've found that it isn't great on is glass.

Making All-Purpose Concentrate: Boil 14 soap nuts in 1L of water. Smoosh them to the sides of the pot with a spoon, getting out all of that mucousy goodness. Boil boil boil...until you're satisfied that it's all absorbed into the water. Strain through cheesecloth and put into a spray container. It's a botanical extract so keeping it in the fridge will extend the shelf life. I usually make a new batch on Sunday and then use it for everything throughout the week. For Laundry use about 4tbsp. You can add vinegar or tea tree oil as an anti-bacterial agent. They smell very mild, sort of like a fig. I sometimes add essential oils depending on what I'm cleaning. Pine oil for floors, lavender in laundry etc.

If you want to try Soap Nuts you can send me an e-mail at brandi_kaleka@hotmail.com. I plan to use them from now on so I have ordered an industrial quantity and would be willing to share. Why doesn't everyone use these?

Soap for a Year - Basic Soap Recipe

This one of many Basic Soap Recipes. It will give you a huge block of plain soap. From there you can cut off smaller batches to melt down and make your specialized soaps.


Ingredients (taken from The Complete Soapmaker)
32oz blended vegetable oil or olive oil
74oz tallow
3oz cocoa butter
14oz lye*
41oz cold water

*Lye will give you a chemical burn so have a small dish of vinegar on hand incase it gets on your skin. You can neutralize it immediately rather than getting it together when your skin is frothing off. Always use gloves.

Container #1
Contaier #2

Container #1 Fats: Put the fats (oil, tallow, cocoa butter) into a big pot and melt them down.

Container #2 Lye & Water: Use a microwave safe plastic container for the lye water mixture. Add the lye to the water, not the other way around.The lye will get hot as hell, ~ 200F.
Basic Soap before drying
Trailings
Next: The idea is to get the fats and the lye both to between 95F-100F at the same time. It can be a bit tricky but I do this by setting the pot of fats on the counter and setting the lye solution in a cold water bath in the sink. Once they are the right temperature pour the lye into the fat, stirring constantly for what seems like a long time. Stir, stir, stir until you get trailings. Trailings are present when you can drip the mixture on top of itself and it stays for a bit. Sort of like pudding, google it if it's unclear. It can take up to 30minutes to get trailings but I usually notice them within 10-15miutes with this recipe. Pour the soap into a 12quart container (like the one you used to make tallow), wrap it in a towel and put it in a warn place for at least a day. Voila Soap!
Basic Soap

To Make Soap, First We Render Fat

A little gross yes, but using rendered fat (tallow) in your soap will give it a creamyness that no vegetable fat can compare to. You can use waste fat that you've been cutting from your meats (and freezing of course), or you can visit the butcher. If you can, get suet from the butcher shop. Suet is the white fat that forms around the kidneys. It is renouned as the creme de la creme of soap fats, 10lbs should be sufficient to get a good start on soapmaking. 


Rendering fat basically means that you are taking the fat that you have, waste fat or suet, boil it down with a bunch of water until it's liquid. Then you strain it through a mesh strainer to get out all of the meaty bits. Strain it into a 12 Quart plastic container with a lid, like a rubbermaid. That's about it. Make sure you add a lot of water when boiling it, as much as you want as the fat and water will separate when it cools. Add peanut butter and bread crumbs to the leftover meaty bits and pack it into pine cones to make birdfeeders. This brought Blue Jays to my yard!


Put the container in the fridge overnight. In the morning you will have a solid block of tallow on top and all of the water you added will be at the bottom. You may have to shave off a few grainy bits but don't worry too much about it. Cut up the tallow and put it into freezer bags until you're ready to make soap. It's worthy to get yourself a good soap making book. The one I have is called The Complete Soapmaker.

Tallow

Monday, January 31, 2011

Wormyculture - Get Worms, Save the Planet

Vermiculture makes me think of vermin, and they're a hard sell.... this has nothing to do with vermin.

Basically you imprison and enslave worms to decompose all of your food waste. Aside from a little verbal abuse, all they need is a constant supply of your food garbage and they will produce for you a humus as rich as aztec gold. You'd think that a vat of worm poop would stink, or that at least the yet-to-be-composted waste would stink but it doesn't...weird I know.

Sometimes you will see them trying to escape up the sides of the prison walls. This is probably a sign that something is wrong. It could be a few things but these are the most common causes of mutanee:
1. They are starving, so add more food. Adding newspaper (usually has unbleached paper and soy based ink) as a backup food supply is great because it will also help to soak up excess moisture...which brings us to our second trigger...
2. Moisture. They are amphibious little critters but finicky sometimes. They like the moisture to be just right. You can just take the lid off for a while (a day, two, three), they will wriggle below the surface and the moisture will evaporate, or add newspaper and turn the compost.

Of course the most important thing here is making your own super-rich fertilizer, even if you don't have a garden and you just throw it on your lawn. But the other most important thing is that you are keeping food waste out of the landfill. Now I don't know if you know how damaging food waste is in a landfill so here is a link if you want to read a little more.

Food is not meant for landfills, in fact food in landfills creates methane gas, an extremely potent greenhouse gas. Get Worms, Save the Planet

Preservinator

Basil Pesto
Not only do Jeramy's parents grow incredible tomatoes but they also have basil trees. This is not all, but just some of the basil we used to make pesto preserves.
Recipe 
2c fresh packed basil

1/2c grated parmesan-reggiano cheese
1/2c extra virgin olive oil
1/3c hemp hearts (or pine nuts)
3 garlic cloves
salt to taste
-blend in food processor until smooth. pressure preserve.

Pickles Part 1
Many things were pickled in the Great Pickling of 2010. Asparagus, beets (always cook them first), even a peck of pickled peppers. I prefer this recipe
Classic Garlic Dill Pickle Recipe
3-4kg of cucumbers (long english skin type)
4c white vinegar
12c water
2/3c coarse pickling salt
16 garlic cloves, halved
8 sprigs of dill
chili peppers optional
- Soak the cucumbers in ice water for 2hrs. In a pot bring all of the other ingredients to a rapid boil. Pack sterile jars with cucumbers, garlic and dill. Top with pickling liquid. Pressure process to seal.

 Pie in a Jar
Pack apples into sterile jars and then pour the sauce over them, not the other way around. I made the mistake of putting the apples into the sauce, way more difficult.
Recipe
4 quarts cored peeled apples (read above)
2 1/2c sugar
6c water
1/2c cornstarch
1tbsp lemon juice
1tsp cinnamon
1/2tsp salt
pinch nutmeg

Garden 2010

This summer we turned the meager backyard we have into the beginnings of a beautiful garden. Jeramy and his dad built a 5 x 20 greenhouse, partially with some "re-claimed" heritage bricks we "aquired". Then we rototilled and sectioned the rest of the yard save a small path. A book to inspire you on creating your own edible greenspace is Food not Lawns.

                                Spinach

The best thing of all this year was Spinach!! We froze it and canned it ground it and just ate it. Next year, a little less spinach. In fact, next year will be Norfolk heirloom spinach from Manitoba's Heritage Harvest Seed
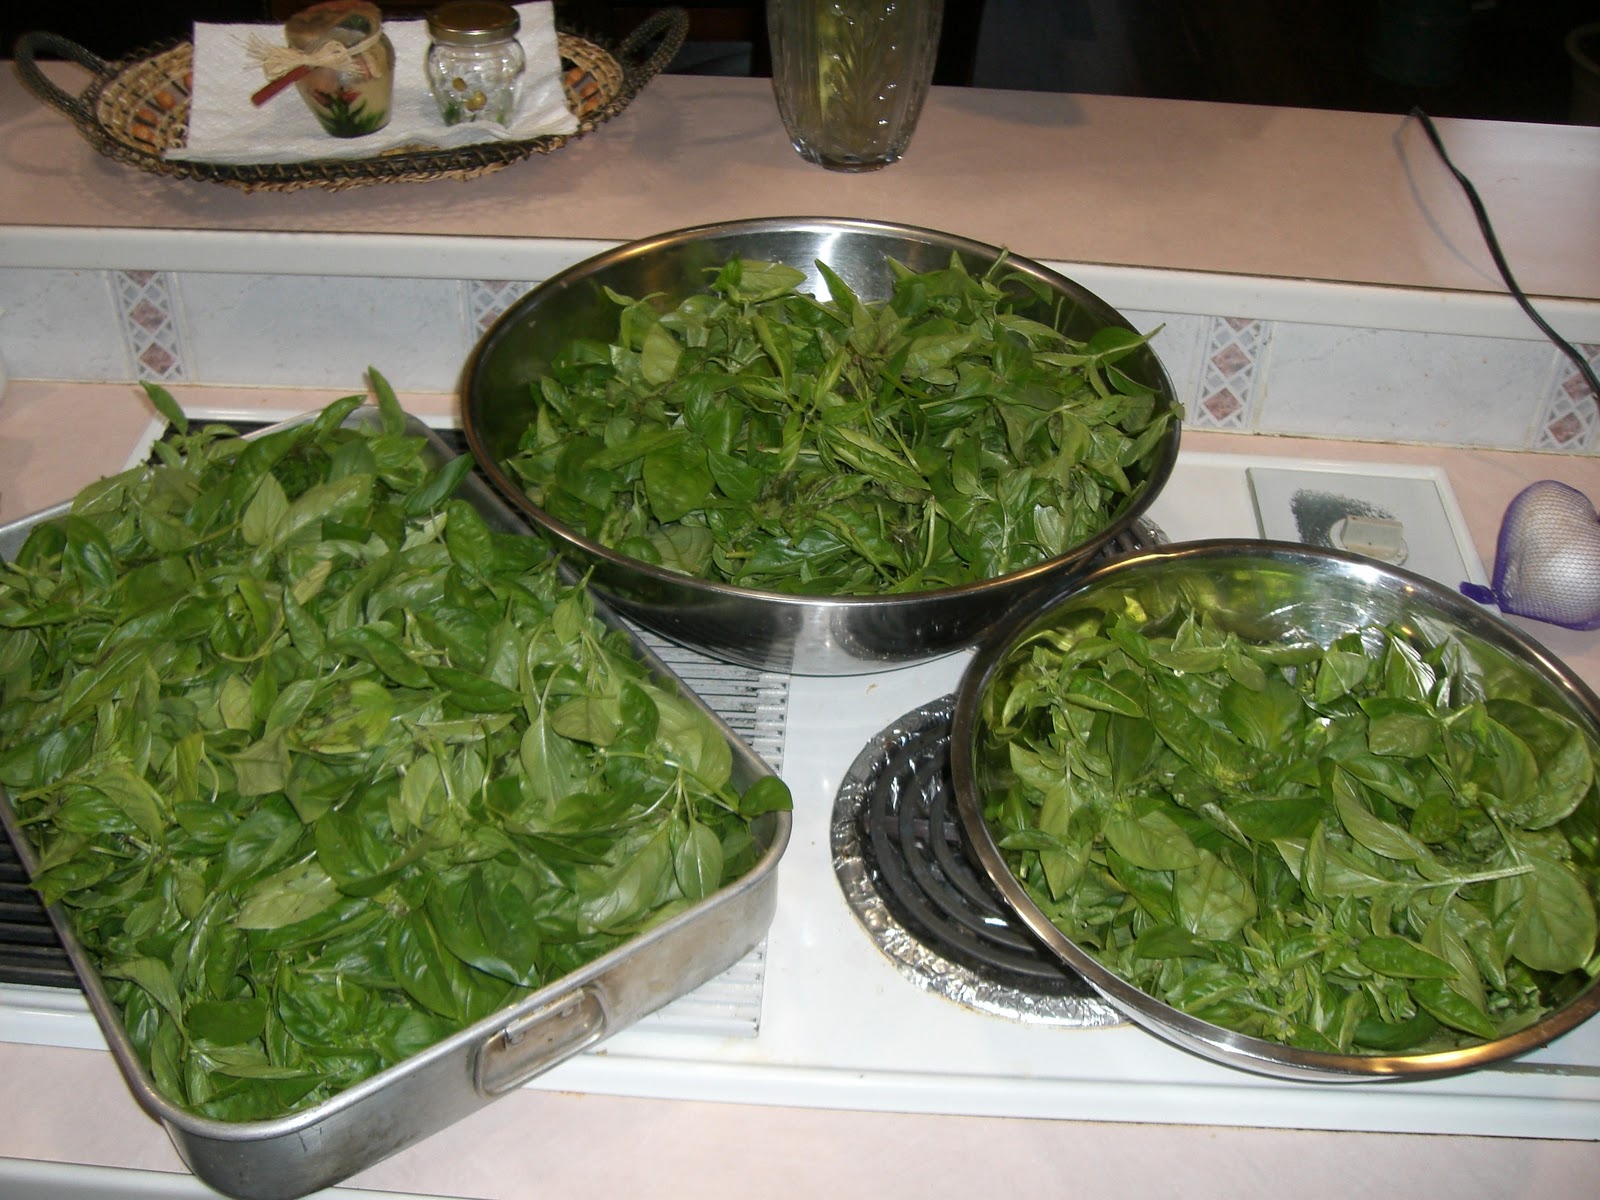
Recipe:  Fried Sweet Spinach Stems
When preserving spinach you may take the time to remove the spine. Jeramy did and then he found an amazing way to eat them.
Just fry them on a hot pan with some butter and brown sugar, only for a few minutes so they keep some of their crunch.

                                      Straaaawbrrries
This was the first year for the strawberry patch. There are a few garden center specials and a few heirloom variety that Louis from the Hollyhock Market in Mortlach gave to me. We were worried about how to net this area off from all of the birds. Turns out that we didn't need a net, and we didn't need to feed the cat! That's terrible I know. I remember a saying about viney plants like strawberries and creeper vines
The first year it sleeps, the second it creeps and the third it leaps.
                         The Greenhouse
The tomato half was okay and the other half was terrible. 
Lesson #1 not everything likes to be on a mound, but in a mound...much better.
Lesson #2 Tomato grower extraordinaire, Jeramy's dad  buries his tomato plants at least 6" deep. This is important for their elaborate feeder root system. They like being deep. Also, Jeramy wants to plant a fish under one...
Lesson #3 It can be too hot. Tomatoes need to breath too.


                    Potato Patch Boooooo.....
We planted 2 varieties, Burbank and a fingerling called Banana, allegedly 85-100lbs worth. Beautiful fresh mound, big tall healthy looking foliage and nothing but 5 lbs of stone sized nuggets and some decomposed seed potatoes. SK did have the wettest season since Jesus, but still. Next year no potatoes. They take a lot of room and they are so easy to find at farmer's markets. I got a blue skinned potato for $1.50 / 5lb bag at Moose Jaw's Yara Community Garden market.


                          Cayenne Peppers
Along the potato patch we planted  cayenne peppers. They took a long time to fruit but when they started you probably could have sat and watched them grow. They had not turned red before we had to pick them but within about 2 weeks they were all red.
Lesson #1 use a knife to save the seeds, not your thumbnail..


                            Garden Box

This area had squash, mint, parsley and kidney beans.
The Squash vegetated a lot but then got powdery mildew from all of the moisture. Puny little fruits formed then molded. It was gross, we picked it
The Mint hails from the dryer vent in the strawberry patch. If not monitored closely this mint may take over the world. The leaves are the size of my palm..and furry...like it's alive. It'll be there until armageddon, and beyond.
The Parsley, well I like parsley but that much parsley was ridiculous. I was tying it in bunches and giving it in bouquets.Parsley pesto perharps.
Holy Mint!!
The Kidney Beans were planted late and all things considered they did okay. They're an heirloom so they  replaced themselves for next year.
TIP: Start seeds in a large container rather than a peat puck. When they sprout they're fast! Transplanting is hard on them, so do it only once.


                            Fucit Row
This little gem was a surprise. It is between the fence and the greenhouse and rarely sees breaks of sunshine. Anything leftover we put into this row, a sink or swim row. Turns out mint loves being here. So, I planted 8 types of mint, logical right?. Since mint is perennial, this row will all come back next year. With the addition of West Coast Seeds CatMint, 10 out of 10 kitties say it's better. Also, as a side note, if you feel inclined to make cat food, this is a tasty addition.

Chocolate is a Vegetable

Cocoa Beet Cupcakes - (gluten free / vegan )
Yields 12
my version, a little different than the book
1c cane sugar
3tbsp cocoa
1tbsp both baking powder and baking soda
1/4tsp sea salt
Mix together in a large bowl, set aside dry mixture.

2 beets (steamed and soft)
1c 'buttermilk' (1tbsp apple cider vinegar + non-dairy milk)
1tsp pure vanilla extract
1/2c non-hydrogenated coconut or sunflower oil
In blender mix first 3 ingredients, slowly pouring in the oil. Stir wet into dry mixture. 
Bake at 350F for 25 minutes.

Strawberry Icing

2c powdered sugar
2 tbsp non dairy milk
1/2 c non-dairy margarine or coconut oil
1tsp pure vanilla extract
1/4 c strawberry puree
Whip it up. Frost when cupcakes are cool.

Adventures in Yogurt

My recipe (makes 1L)
- 2C homo milk (3.25%)
- 2C table cream (10%)
- 1/2C whole milk powder
- yogourmet starter
Christmas 2010 brought me a Yogourmet yogurt maker. It's a handy little contraption but not totally necessary. There are very few things that you actually need:
- milk and or cream and or milk powder
- double boiler, (or in my case a stir fry pan on top of a pot) 
- thermometer
- yogurt culture (either leftover yogurt or probiotic starter. Yogourmet makes one)
- and, in lieu of a yogourmet, you'll need a container for the yogurt and a warm bath for it to rest in.

Pour milk into double boiler and, since it's already pasteurized, bring it up to about 40C or 105F. Add the culture making sure it's all dissolved. Pour into a container and submerge into a warm bath. Then let it sit...no less than 4 hours, possibly overnight. Refrigerate. Liquid will be present every now and then, just pour it off. Add whatever you want for flavor.
 
Using the 10% keeps a creaminess that I just can't sacrifice.  Whole milk powder isn't instant, it needs time to absorb. If you use it too early the yogurt will not be smooth but rather will have a grainy texture. I prepare it the day before but I'm sure a few hours would suffice. If you want to make low fat yogurt my advice would be to use skim milk powder, doubling the amount, and lower fat milk. Play with it and make it your own. You can use the yogurt you make as starter for your next batch. I don't think you can go on indefinitely like this, but I don't actually know. Also beware gelatin! You ca use it to make thicker yogurt but you cannot use this yogurt for starter.

Of course using higher milk fat dairy products will give you thicker yogurt. I made a few batches with 35% whipping cream and it was divine!! Loaded with tasty milk fat but insanely good! On the flip side I also tried using skim milk (no milk powder). The result was quite runny and very tart, nothing like the 35%, but still good for smoothies.


* After reading the ingredients on the yogourmet starter culture I decided to use just the probiotics. I bought a combination Acidophilus & Bifidus (and rhamnosus) and am now awaiting the result! I'll let you know how it goes. Also to come...Soy Yogurt!